
In the intensive times at work, most of us don’t have time or energy to bother with the little details on the coding standards. But sometimes these things that we avoid chase us. When we finally end up with a spagetti code or deploying issues or environment management issues, then we take action to fix these stuff. These issues can be reduced drastically from the beginning of the projects. I will share some basic and easily applicable tips for project structure and boilerplates.
A boilerplate (a.k.a. skeleton code, base template, scaffolding, starter kits) is simply a code repository to generate or start new projects from it. You define everything you use in a project from the beginning, e.g. ignore files (.gitignore, .dockerignore, …), config files and structures (lint configurations, testing configurations, environment configurations, …), code style, project structure and so on… If you want to start a new project, you just need to fork the boilerplate repo and build on it.
Benefits:
- Consistency on code structure and code design
- Follow best practices from the beginning
- Quick start to development on a new project
- Good documentation
TL;DR (Show me the code!)
Build your standards once, and then build your projects on top of it.
You can see the complete template code in my Github Account
When to Use a Boilerplate
Boilerplates has cool benefits, yet in some cases you better start from scratch. You may need to produce boilerplates if you are going to…
- … share it as a learning resource
- … use it as code example presentation
- … create a proof of concept
- … create multiple projects for production with similar infrastructure, dependencies etc…
- … share the coding standards with other developers
other situations than the above, you might not really need a boilerplate. Contrary, boilerplates might limit your elasticity in development in different aspects.
An Example Boilerplate
We are going to create a boilerplate for FastAPI (Python3 web framework), which features;
- Split development environments & configs
- Easy to spin-up & develop
- Automated tests in docker
- Multi-stage docker builds
from the beginning. So you don’t have to deal with these stuff unless you need something custom. Just focus on development!
Our project structure will be:
fastapi-boilerplate
├── configs
│   ├── .env
│   ├── local.env
│   └── prod.env
├── requirements
│   ├── base.txt
│   ├── local.txt
│   └── prod.txt
├── src
│   ├── helpers
│   │   ├── __init__.py
│   │   └── config_helper.py
│   ├── models
│   │   ├── __init__.py
│   │   └── models.py
│   ├── routers
│   │   ├── __init__.py
│   │   └── router.py
│   ├── __init__.py
│   └── main.py
├── tests
│   └── test_api_endpoints.py
├── .dockerignore
├── .gitignore
├── .pylintrc
├── Dockerfile
├── README.md
├── docker-compose.yaml
└── run.py
Explanation of the Project Structure
Just the production and local environments are involved to reduce the complexity of the example.
-
All the source code is held under
/src(src layout) and the code is separated into 4 pieces:/src/helpers/: Helper modules, utility functions/src/models/: Request and response models, custom error models/src/routers/: Separated and grouped API endpoints/src/main.py: Main script which defines the ultimate API server
-
Both
requirementsandconfigshas a base file which has the least common configurations (subset of other configs) and its data is overwritten at runtime by a supset of configs. See ‘Managing the Config’ section for detailed example. -
.pylintrcis the configuration file for Pylint. You can set your linting standards here. -
.gitignoreand.dockerignoreare not optional in my humble opinion, they must exist in all of your projects. You better be meticulous on what you push to your remote repository or what you include in your production image. Cruft comes into existence this way. -
Dockerfilekeeps our multi-stage docker build manifest. And we also have adocker-compose.yamlfile. “But why?” you ask. Becausedocker-compose upis the short hand for:
|
|
- We have a
main.pyunder./src/andrun.pyunder root directory. You may wonder the bother. You’ll see the reason behind thisrun.pyin Running Tests section. - Do you ever use
README.mdfile? I believe every developer has notes to other developers. So why not jot down your notes and other details, need-to-knows in the place reserved for it (swh).
Managing the Config
One thing to use from the birth of a project, it’s the config. Most of the projects I’ve seen so far, uses the application settings in application state, which is being carried to every corner in the app in an event loop (for asynchronously working microservices), for example. If not, it’s being read from a config file every time it’s been called.
A simple yet comprehensive solution might be something like:
|
|
See Pydantic Validators, Pydantic Types and Python Dotenv Library for more detail.
When you run your program on your local machine, with no environment variables, the program will run with local variables. As we will see in later sections, when you run your program with docker or docker compose, the program will run with production variables.
Spin-up the Project
It should be easy for a developer to spin-up a project with different environments and settings. It can be time consuming to adjust settings to switch development environment.
Using separate requirements, environment variable files, multi-stage docker builds and docker-compose can overcome this issue.
|
|
Checkout my other blog post (external link to my blog) for more details on multi-stage builds.
|
|
With this setup, we can switch between environments, builds with one simple command:
|
|
Running Tests
Test cases are separated into the ./tests/ directory to keep the ./src/ directory plain. You won’t use the tests at runtime anyway, so no need to keep them under ./src/.
Running tests on a src layout can be tricky because of the import rules of Python. Both tests and the project has to be started from the root directory. Otherwise, you might encounter import errors while trying to run the tests or the program itself.
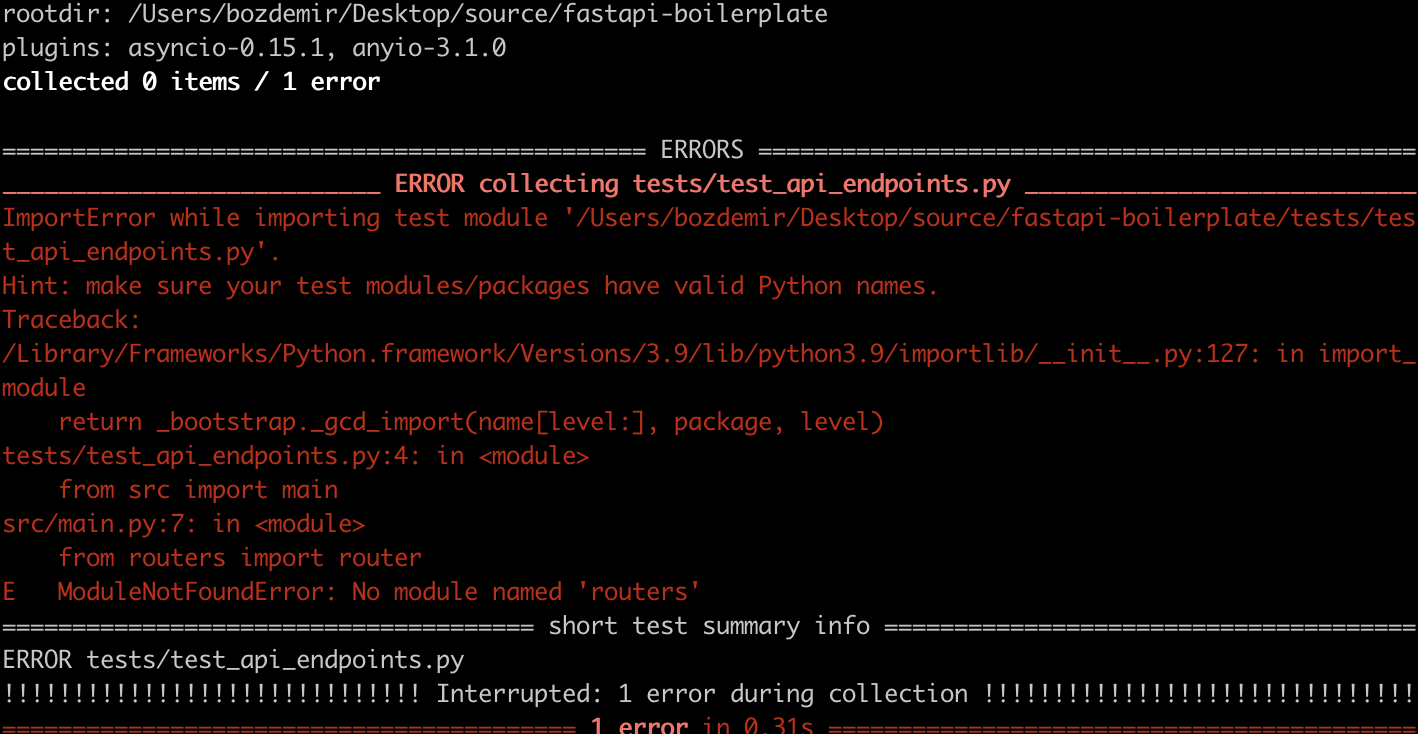
But we already have a main script to run at the root: ./run.py . So we can run the program in root directory and test it in the same place without facing any import errors.
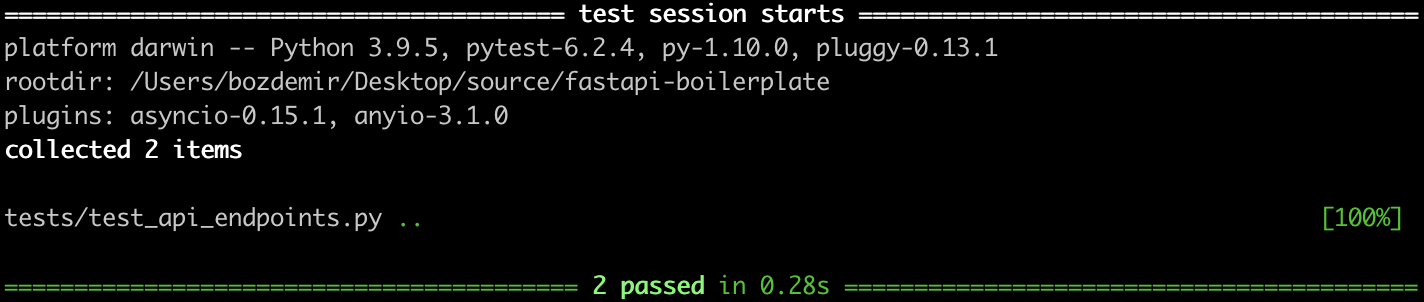
We can also run our automated tests in docker multi-stage builds or at CI/CD pipeline. You may also add listing using pylint and security checks using bandit.
Conclusion
I believe that a developer should get right into coding, without any efforts on adjusting the environments or changing/creating coding standards. As you can see in the example code I’ve written, my needs in a project is;
- Environment, dependency management from the beginning
- Automated Tests
- Sentry Integration, etc…
So I’ve decided how should this needs ought to met. I’ve set some standards from the scratch and that should save me lots of time during the life of the project.