
Building a Docker image with ordinary quality is quite simple. Pull an image, copy your app into the container, install the dependencies and run your program.
If you’re thinking beyond just successfully ‘running’ the program, you’re at the right place. We are going to dive into the details of our image contents, reduce build time, run tests before creating the image, add functionality to Dockerfile, and ultimately create better Docker images.
Multi-stage builds… You might not have noticed it but you already have been using this method. The base images you’ve been pulling define the anterior stage of your docker images. They’re being built just like you are building an image. So, technically, your base images are the first stage of your builds.
We’ll be doing the same thing here, but in a more detailed way than just using production-ready base images.
TL;DR
- Discard the things you don’t need. Minimize the attack surface and overall size by making the base image as small as possible.
- Run tests (Continuous Deployment) while creating the image (recommended for production).
- Separate the phases of your build process.
- Create your custom base image and use it in your projects.
We’ll work on a simple FastAPI (a Python3 Web Framework) example, and our folder hierarchy will be;
.
├── .dockerignore
├── .pylintrc
├── Dockerfile.plain
├── Dockerfile.multi
├── requirements-test.txt
├── requirements.txt
├── app
│   ├── __init__.py
│   └── main.py
└── tests
    ├── __init__.py
    └── test_api.py
You can see the contents of the files at this repository.
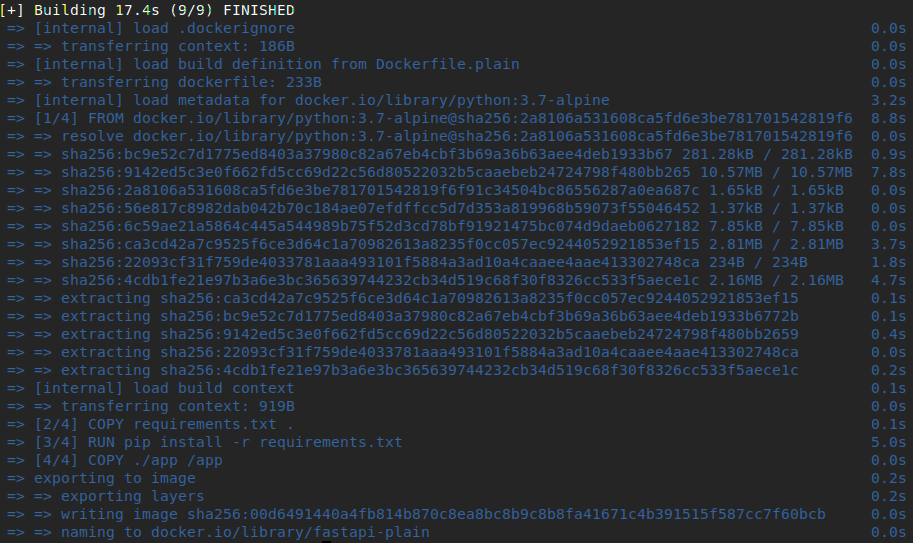
With the Dockerfile.plain build, we have:
15.5sbuild time with no cache. Actually, it’s notably good build time, but it’s going to exponentially increase when the project gets larger.50.2MBimage size- No automated tests
- No linting
- No security checks
- No proper base image
- No elegance
- No separated developing environments
- Lots of cruft (when the project gets larger)
- Wider attack surface
- Just working
FROM python:3.7-alpine

COPY requirements.txt .
RUN pip install -r requirements.txt

EXPOSE 80

COPY ./app /app

CMD ["uvicorn", "app.main:app", "--host", "0.0.0.0", "--port", "80"]
I believe you can see that this Dockerfile does just what I’ve described in my beginning sentences. Pull the image, copy your app into it and run. This approach can be quite enough for almost every situation. It’s plain, easy and working. But, to be honest, I think
Quick note; be aware that the examples in this post are just a simple subset of real-world scenarios. So, the benefits of using multi-stage builds in Docker may vary based on the type of programming language (interpreted or compiled) used in our project, size, and complexity of the project, expectations from the project (security, performance, fault-tolerance), and so on…
1. Building Stage
We need a base image with the necessary dependencies downloaded to use later in the deploy stage. We’re going to download wheels for our required python packages.
Wheels are the new standard of Python distribution, that is to say, they are files to install Python packages -better than the old eggs.
To install wheel packages, we need some low-level libraries installed on top of our base image, alpine. Thus, in the first stage we’re going to install:
python3,python3-dev,py-pip: Python3 packages and piplibffi,libffi-dev: Library related to Foreign Function Interface, in other words, a bridge between interpreted and compiled languages.libuv: Library focused on Async I/O, needed foruvloopmusl-dev: An implementation of C library.gcc: GNU Compiler Collection, needed for compiling the code.linux-headers: Linux Kernel Headers
# alpine is mini Linux, just ~2.7MB
FROM alpine AS build

COPY requirements.txt .

# Alpine Package Keeper: apk
RUN apk add python3 python3-dev py-pip libffi libffi-dev musl-dev gcc linux-headers libuv \
	&& pip install wheel \
	&& pip wheel -r requirements.txt --wheel-dir=/wheels
Now, required packages have been downloaded as wheels and stored in /wheels directory. We can use this build stage as a base image later in similar projects with the same needs. It is lightweight and flexible to be used in similar asynchronous Python web framework projects.
2. Testing Stage
Validating the changes on your projects requires automated tests and automated tests will make your CI/CD pipeline meaningful. Besides, code style and vulnerability checks added to automated tests equal a rock-solid deployment.
For the testing stage, we’re going to install a new set of requirements. As it can be seen in the requirements-test.txt file:
-r requirements.txt: Everything in therequirements.txtpytest: Test runnerpylint: Code style lintingbandit: Vulnerability checksrequests: Used for making requests to test API endpoints
|
|
We’ve copied our requirement files in the root directory (line 3) and install the required packages for tests (line 4). This step was separated on purpose to be cached.
After copying the application and the test files (line 6), we’re running unit tests, code style checks, and vulnerability checks respectively (line 9-10).
|
|
We may also target other developing environments like; local, develop, local-test, you name it. This way, you would deploy your container in any environment as you want, like:
|
|
3. Deploying Stage
Finally, we can run our program. This stage can be written as:
|
|
We’ve chosen the python:3.7-alpine image because installing python on top of the alpine image might result in a larger image.
Note that, in line 3 we’re copying files from the build stage, that’s one of the reasons why multi-stage builds are cool.
Then we install these wheels into our deploy image with no caching (--no-cache-dir flag) (line 6) and then delete everything about requirements (line 7).
We are ready to launch now.
docker build -t my-app . --file Dockerfile.multi
docker run -p 80:80 my-app

curl localhost
Results in:

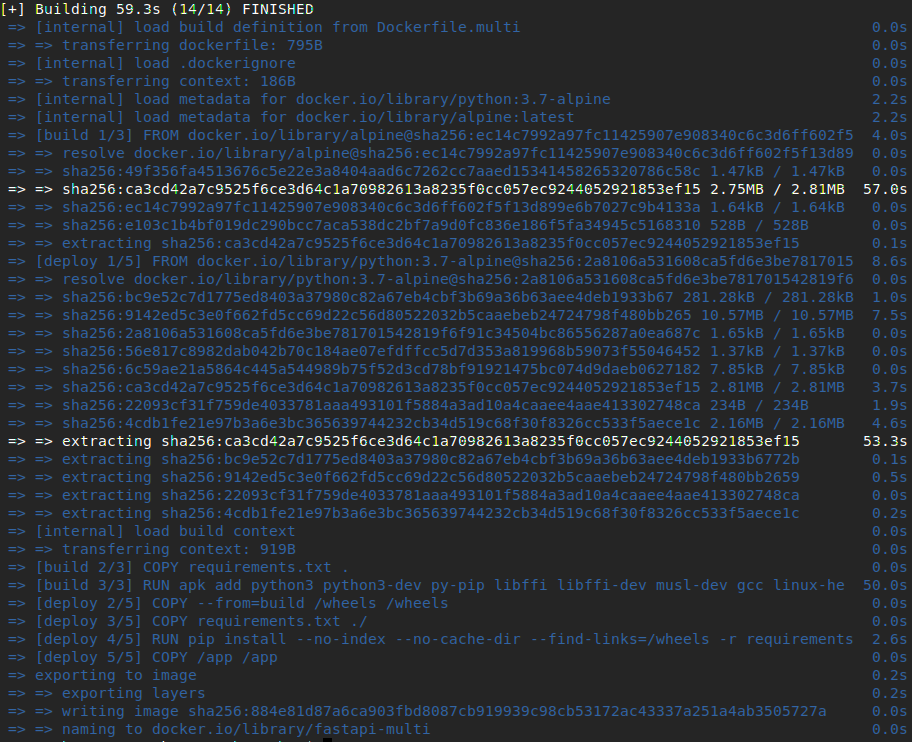
Now we have:
54.0sfor building the base image and11.2s(9.6spulling image,2.6sinstalling dependencies) for deploying the app with no cache. Since the base image will be built once and the image will be pulled once, this build time becomes2.6s. So, after the first build, if any changes are made to the codebase, build time will be something like2.6s-if no step is added to Dockerfile and requirements are not bloated in one commit.50.1MBimage size.- A custom base image designed with our needs in mind, to be used later in similar projects.
- We have our libraries installed manually, both low-level and high-level ones. It’s always good to know what libraries you’re using in your app. When you want to stay up to date, you can keep up with the library’s official changelogs if you know what you’re using.
- Better Dockerfile suitable for better CI/CD pipelines.
- Caching common libraries to be used in similar projects. Only the additional dependencies need to be installed. Which reduces the build time.
Conclusion
You can see that there are lots of advantages of using multi-stage builds. If you’ve your applications running on top of public images, you may benefit in security, performance, and quality by moving from production-ready images to your custom images.
You’ll have maintainable, flexible, and lightweight images at last.
Further Reading
- [1] Multi-stage Builds, Docker official docs
- [2] CI/CD, A great article from Atlassian
- [3] Building Smaller Container Images, Blog post from Google Cloud Platform